Winching It Up
Staff Report
The original idea might have been to use it during a GNCC style race, but we’ve found out that it really can be looked at as an insurance policy. The first trip out after we installed it, we got the chance to use it on a photo shoot when the ATV we were taking pictures of stalled and needed to be pulled up a 75 ft hill. (The wire rope was only 50 ft, so it took two stages to get the job done).
Before installing it, we had heard horror stories about how difficult it may be to mount a winch on an ATV. You do need some patience, but it’s nothing that anyone with minimal wrench experience can do. It’s a three-step process, where taking off the front plastics is done first; then you can run all the wires or mount the plate to the bumper. Keep in mind that the plates are designed for stock bumpers. If you have an aftermarket front bumper on your sport quad, don’t assume it will work with the plate designed for the OEM bumper. Ask you dealer for help on that one.
The directions given supply you with step by step instructions, and there is also limited help from the Warn website. We just thought we’d give you a few helpful hints that we didn’t see printed, but found might be useful to a first-time winch installer.
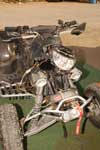
Hint one
If you take off all the front plastic, it will give you a lot more room to work. Placing the winch on the mounting plate is just part of getting everything to fit. Most likely there will be extra wires that you’ll need to tuck away somewhere out of the way too, taking off all the plastic gives you the room to do so.
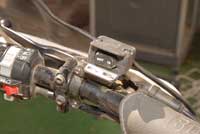 Hint two
We found that placing the on/off switch was a good second step, because the wire that ran from this was fairly short. Since it is limited in length, it gave us an idea of how close the in-line connector for the ignition switch could go. (The connector box is the relay from the on/off switch, winch and battery.)
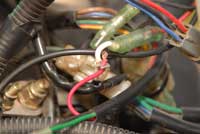 Hint three
You’ll need a line/wire tester to see which of the wires is hot, only while the ignition is on. This is the wire you splice (with the included supplies) to feed the winch with power. Obviously you only want to the winch to work when the ignition key is turned on. Depending on the model of ATV, getting to this wire may be tricky and finding room to tuck the connector box can be tricky.
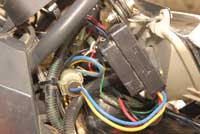 Hint four
In the case of the DS 650, we found that mounting the black connector box to the back of the headlight bolt was a perfect out of the way place to stick it. On other quads, there might be places where it can be zip tied to part of the frame. Some ATV’s will require you to be creative in where you place the box.
 Hint five
Running the power line to the battery was easy on the DS650; we followed along the frame back to the battery, tucking the line inside the side plastic (photo A) where we could and using zip ties to keep it close to the rest of the frame and  around the air box (photo B). We didn’t allow any slack in the line, and only an inch or so when hooking it to the battery terminals. All the access line was tucked and wrapped up front, behind the headlight. At this point, you can connect all the wires (don’t forget to connect to the battery) and see if the winch works properly, before mounting it to your ATV
 Hint six
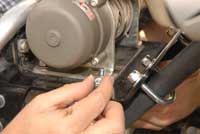
Now that all the wires are in place, and the hardest part is behind you. Mounting the winch to the plate and then plate to the bumper is next. We chose to use the U bolts and mount the plate first. We only tightened the bolts hand tight, until they were all in place and then went back to secure the plate to the bumper. Once the plate was secure we mounted the winch to the plate. You’ll need some patience here, along with a magnet tip to retrieve the nuts…because we dropped them a few times.
We hope these hints have helped you. It wasn’t that hard at all to do, you just need a good place to work and to be patient. When we took our first ride on the ATV, we didn’t even notice the extra 11 pounds on the front end. It will give you more piece of mind when riding in mud or snow and for that occasional up hill climb.
