Tech Tip 4 Proper Head Torquing Technique

Tech Tip #4
Proper Head Torquing Technique
 new piston and rings are snuggled down inside the fresh bore. The head gasket and oil control O-rings are in place. The head is down. Now you reach for the ratchet to tighten the head bolts/nuts . . . STOP RIGHT THERE!!! You don’t touch those head bolts/nuts unless you have a torque wrench in your hand!
There is absolutely NO WAY you can get all four or more bolts/nuts evenly tight without a torque wrench with some sort of measurement gauge. Tightened down without the aid of a torque wrench, the head will actually warp out of true. The ONLY thing holding the head gasket in place against the tremendous pressure developed inside the combustion chamber and cylinder is the EVEN pressure of the head crushing the gasket into the top of the cylinder. This is why you NEVER reuse a paper/metal combination head gasket; once crushed, it doesn’t provide the resistance to the compressing pressure that forces it to conform to any irregularities in the head and cylinder.
;) Best case: the head gasket simply blows out and the motor refuses to run from a lack of compression. Worst case: the motor continues to run and–depending on where the blowout is–the internal pressure rises from leaking combustion gases and pops various oil seals, blows oil out the breather, allows coolant into the combustion chamber to be burned or into the oil to turn the oil into a non-lubricating froth. If you are REALLY unlucky, the path of the hot gases through the blown head gasket will score the head and cylinder, requiring replacement of both!
Best case: the head gasket simply blows out and the motor refuses to run from a lack of compression. Worst case: the motor continues to run and–depending on where the blowout is–the internal pressure rises from leaking combustion gases and pops various oil seals, blows oil out the breather, allows coolant into the combustion chamber to be burned or into the oil to turn the oil into a non-lubricating froth. If you are REALLY unlucky, the path of the hot gases through the blown head gasket will score the head and cylinder, requiring replacement of both!
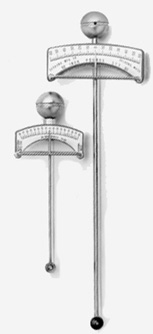
A simple beam-type torque wrench is all that is needed to do the job correctly. You don’t need one of those fancy click wrenches; leave those for the people with their names embroidered on their shirts (so they don’t forget who they are).