Tech Tip 14 Drilling out Exhaust Studs

#14
Drilling Out Exhaust Studs
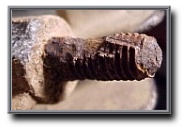 One of the hardest jobs a drill bit can do is to drill out a broken exhaust stud. Recently I had to do all four of an ATC 350X. The condition of the studs was extremely poor due to years of running sanded and salted roads in the wintertime.
I had recently been talked into purchasing some very expensive drill bits, with the promise that they would be better than anything I had ever tried before. Ya, Right! They are guaranteed for life never to break. In fact if you do manage to break one, you receive two under the lifetime guarantee. They are also so hard they can’t even be sharpened by conventional means.
;) As a bonus, the points are anti-walk, you don’t have to chase the bit across your work surface anymore. The point digs in immediately and starts to drill. The story goes they are manufactured for the aircraft industry, by one of the major players, in-house for their own use. Code named Black & Gold by Santa Fe Freight & Salvage, these are supposed to drill just about anything!
As a bonus, the points are anti-walk, you don’t have to chase the bit across your work surface anymore. The point digs in immediately and starts to drill. The story goes they are manufactured for the aircraft industry, by one of the major players, in-house for their own use. Code named Black & Gold by Santa Fe Freight & Salvage, these are supposed to drill just about anything!
This job ahead would be a good test because given the condition of the exhaust studs, there would be little chance of drilling a single hole and using an “easy-out” to back the studs out. I anticipated drilling a series of several holes, each increasingly larger than the previous to slowly remove all the stud and hopefully leave just aluminum to await a Heli-coil and a new stud. All, times four!
The first step is to prepare the surface for drilling. The surface must be smooth so the drill will go in straight. A Dremel with a fiber cutoff wheel is used to remove the rusted stud and leave a smooth surface, flush with the aluminum boss.
;) was selected that was about 1/2 the studs 8mm diameter and a pilot hole was drilled. The bit didn’t wander, staying in the dimple. It easily chewed its way through the hard stud like soft mild steel, throwing strings of steel in all directions. Next up, the hardest thing a bit can do. Slightly enlarge the hole. A B&G 1/32in. larger was selected and chucked up in the drill. A normal HSS (high speed steel) bit can spot overheat at the ends of the flutes and dull rapidly when trying to ream out a hole in hard steel. Again the B&G worked its way through the stud easily. Two more times this operation was performed to enlarge the hole to just the size of the steel stud and not eat any of the surrounding soft aluminum.
was selected that was about 1/2 the studs 8mm diameter and a pilot hole was drilled. The bit didn’t wander, staying in the dimple. It easily chewed its way through the hard stud like soft mild steel, throwing strings of steel in all directions. Next up, the hardest thing a bit can do. Slightly enlarge the hole. A B&G 1/32in. larger was selected and chucked up in the drill. A normal HSS (high speed steel) bit can spot overheat at the ends of the flutes and dull rapidly when trying to ream out a hole in hard steel. Again the B&G worked its way through the stud easily. Two more times this operation was performed to enlarge the hole to just the size of the steel stud and not eat any of the surrounding soft aluminum.;) Finally the remaining shell is removed. A Heli-coil is installed (See Tech Tip #13) and the stud installed. Note: It is normal for an exhaust stud in a Heli-Coil to set deeper than a factory installation because the stainless steel threads have to be slightly below flush and the stud’s shank “bottoms out” on the threads. After four studs the B&G’s are just as sharp as when I started. This job was accomplished in less than one hour! In no small part to the B&G drill bits. And because the holes were drilled straight, not once but four times, the headpipes even fit!
Finally the remaining shell is removed. A Heli-coil is installed (See Tech Tip #13) and the stud installed. Note: It is normal for an exhaust stud in a Heli-Coil to set deeper than a factory installation because the stainless steel threads have to be slightly below flush and the stud’s shank “bottoms out” on the threads. After four studs the B&G’s are just as sharp as when I started. This job was accomplished in less than one hour! In no small part to the B&G drill bits. And because the holes were drilled straight, not once but four times, the headpipes even fit!