NOS Nitrous Install
You can purchase this system for around 0 or so. Look around and you more then likely can find it cheaper. You also have the option of piecing a system together. That is for the knowledge of the installer. I am going to give the basics of installing a nitrous system. I have run nitrous for years and have always enjoyed it.
I will be using the DS 650 for the install. I have done many differently installs on the D S65 0. But this system is for any single cylinder quad of 250 cc or more. So everything can be integrated for any quad out there.
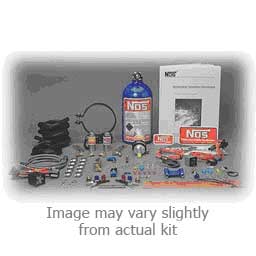
;) To start thin gs out. Lay everything out and make sure you have what you need to install this system. Once you have that its time to get down to business. Start out by finding a good location to mount the Nitrous bottle. I have always mounted them up front, but it doesn’t really matter where. Just remember you may have to remove the siphon tube from inside the bottle for different mou nting location s. Yo u can refer to your instructions that you got with the kit on which way to point or remove if necessary.
To start thin gs out. Lay everything out and make sure you have what you need to install this system. Once you have that its time to get down to business. Start out by finding a good location to mount the Nitrous bottle. I have always mounted them up front, but it doesn’t really matter where. Just remember you may have to remove the siphon tube from inside the bottle for different mou nting location s. Yo u can refer to your instructions that you got with the kit on which way to point or remove if necessary.
You are going to want to run the nitrous feed line from the bottle to the Nitrous selonoid. Once you have that mounted to your liking, move onto mounting the selonoids. You can mount them anywhere you want, but keep in mind that the closer they are to the fogger nozzle the more effective it will be. I made a bracket to mount off a TM45 carburetor. But you can use the supplied brackets and mount them to your liking. Once they are mounted, it is time to tap the intake for the fogger nozzle.
Your kit comes with the right tap for this, if not it is a 1/16 inch pipe thread or npt. You will need to drill a 1/4 inch hole in the bottom of the intake then tap the hole with the supplied tap. Make sure to use some Teflon past on all the npt threads for this system. If your quad doesn’t have an aluminum intake, the kit comes with a supplied collar and nut to install in the rubber intake off the carb. See below pic number 5. Do not use thread tape, it can deterio rate and get trap ped into selonoid or one of the jets. Now its time to make your lines, cut them the same length for each selonoid.
You want them to be as close as possible. You don’t want the nitrous to get there before the fuel. You want them to reach the nozzle at the same time. No w it is time for the fuel system. Choose a good spot for the fuel pump so it can be gravity feed from the tank. I do suggest on either purchasing a Pingel dual outlet petcock or modifying the stock one. You want to;) keep a steady supply of fuel to the motor. For some it might be easier to just purchase the pingel and call it good, but for those of us who don’t want to spend the on one, a modified stock one will do the job. Now run the fuel lines to the fuel selonoid.
keep a steady supply of fuel to the motor. For some it might be easier to just purchase the pingel and call it good, but for those of us who don’t want to spend the on one, a modified stock one will do the job. Now run the fuel lines to the fuel selonoid.
Be sure to use some sort of fuel filter, you can use the one that is supplied with the kit or you can use a better one if desired. Using a filter will help maintain the selonoids. Be sure to use the fitting that has a screen in the end of it for the Nitrous selonoid, it will be blue. That one will keep debris out of the Nitrous selonoid. I use aeroquipt an fitting wherever I could but that doesn’t have to be the issue. Rubber ho se and hose clamps w ill work just fine. Besides it all comes in the kit anyway. Tighten all your fittings going into the selonoids and use Teflon paste, They do provide paste for you. Now it is time for the tricky part, mounting the micro switch. I do not recommend using a push button to activate the nitrous. Too many times the button has been pushed when they’re not supposed to.
You only want to activate the nitrous at wide open throttle. This is where the micro switch come into play. If you have a TM45 or 48 carb it is a little easier to install the switch . If using a stock carb You will have to make a bracket on the ;) thum b throttle off of the handlebars. But hey how many of us use stock carb s anyway. I mount the switch to the side of the carb and use a roll pin or screw to activate the switch. There is by far no better way. This has proven to be reliable every time.
thum b throttle off of the handlebars. But hey how many of us use stock carb s anyway. I mount the switch to the side of the carb and use a roll pin or screw to activate the switch. There is by far no better way. This has proven to be reliable every time.
Now that everything is mounted and ready, it is time to do all the wiring. This also isn’t to bad either..
;)
The easiest way is to follow the instructions given with the kit. But here is a diagram to help out. You will want to mount the arming switch somewhere you can reach it while sitting on the bike. I put it in the dash right next to the ignition switch.
Now tap the micro switch, you should hear clinking from the selonoids. If you do then it is all wired correctly. If you don’t then there is a problem somewhere. Now hook the ground wire on the fuel pump back up. Arm the system again and make sure it is coming on. If it is then you are all set. The system is ready to go. But go back over everything and make sure no thing is loose anywhere. If everything is tight, it is time to try it out. I like to purge the system through the motor before I take it out. To do that open the bottle valve all the way. Make sure you have no leaks of course. Now start the bike and let it get to operating temp. Once that has happened hold the throttle at about 3000 rpm steadily. Now arm the system and tap real quickly the micro switch. First few times it should cut out. This is due to all the air in the system . Keep tapping the switch once the engine clean s out. When you tap the switch and the rpm’s increase then you have purged all the air out of the system. Now shut it off and take a breathe. Now you don’t have to do this every time you want to use the nitrous. I just do it when I change the bo ttle. With th e setting of 15hp you cou ld get away w ith runn ing at least 93 octan e fuel. An ything higher you wou ld wan t to bump up the octane. You will be able to run a 15 hp shot very reliably as long as the motor gets enough fuel.

comes with the kit, it keeps a con stant 4 psi of fuel, which is what this sytem is designed on jetting for. I have added the jetting horsepower chart for a good reference. I suggest starting low and them progressing more as you get used to it. Just don’t get to carried away on jetting. Certain quads can handle more or less nitrous then others. T here is only one problem with nitrous and that is the bottle never lasts long enough. You will see that when you start using it. Good luck and have fun….
;)